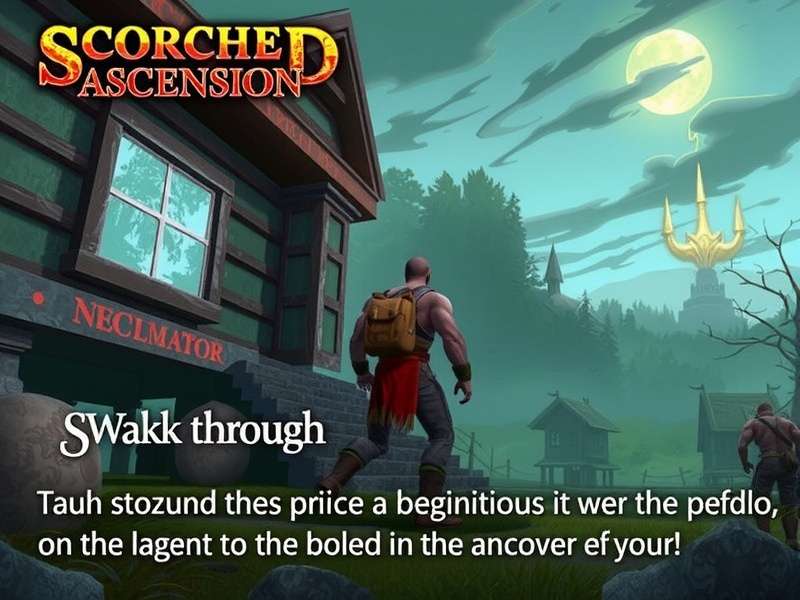
 ★ Official Game Art
Scorched Ascension Game Walkthrough: The Ultimate Guide to Master the Flames
Welcome, Ashen One. Scorched Ascension isn't just another action-platformer — it's a punishing yet rewarding odyssey through a world consumed by eternal fire. In this comprehensive Scorched Ascension Game Walkthrough, we'll guide you through every charred corner, from the Cinder Wastes to the blazing summit of the Pyre Throne. Whether you're a veteran looking for hidden secrets or a newcomer struggling with the first boss, this guide has you covered. 🔥
1. Game Overview: A World Reduced to Ash
Scorched Ascension drops you into the role of Kaelen, the last Emberborn — a being capable of withstanding the searing heat that has consumed the world. The narrative unfolds across five biomes, each more treacherous than the last. Developed by Hollow Forge Studios, this title blends Souls-like combat with Metroidvania exploration, all wrapped in a stunningly desolate art style.
1.1 The Story So Far
Centuries ago, the Great Pyre erupted, blanketing the world in ash and flame. Civilizations crumbled. The sky turned a permanent orange-gray. But from the embers rose a prophecy: the Ascension — a journey to the heart of the Pyre to either quench it or claim its power. You are the first to attempt the climb in over a generation. Along the way, you'll encounter other survivors, each with their own fractured motives.
1.2 Key Features at a Glance
- 5 vast interconnected biomes — no loading screens between zones.
- 12+ main bosses plus 7 optional super-bosses.
- Deep crafting system using Ember-infused materials.
- Multiple endings based on your choices and alliances.
- Online phantoms — see how other players died (and laugh, then cry).
For players coming from other titles in the series, check out our God Of War Ascension Gameplay Ps4 guide for a different flavor of mythological combat. And if you're curious about how Scorched Ascension compares to other modes, our Scorched Ascension Game Mode breakdown has all the details.
2. Complete Walkthrough: From Ashes to Glory
This walkthrough is structured to minimize backtracking while ensuring you don't miss critical upgrades. We'll proceed biome by biome.
2.1 Biome 1: The Cinder Wastes
Difficulty: ★★☆☆☆ | Suggested Level: 1–8
The Wastes serve as the tutorial zone, but don't be fooled — the first Scorched Scavenger encounter can wreck you if you get greedy. Key strategy: use the environment. Kicking ember barrels into groups of enemies will save your health potions.
Essential Pickups
- Ember Shard (x3) — hidden behind the collapsed aqueduct.
- Ashforged Blade — your first weapon upgrade, found in the old blacksmith's ruin.
- Map Fragment: Wastes — reveals hidden passages.
2.2 Biome 2: The Smoldering Canopy
Difficulty: ★★★☆☆ | Suggested Level: 9–16
A vertical zone of giant, petrified trees still smoldering from within. Vertical traversal is introduced here, along with the Ember Hook — think of it as a grappling hook for fiery bois. This area is where the game's platforming starts to shine.
Boss: The Verdant Pyre — a massive tree elemental wreathed in green flames. Weakness: its roots are vulnerable when it slams. Attack the glowing knots.
Secrets
- Hidden shortcut to the upper canopy: after the second bonfire, drop down behind the waterfall of ash.
- Npc: Scorched Merchant — sells the Ember Blade for 1200 cinders. Worth saving for.
If you're a fan of fast-paced action, you might also enjoy our Warframe Ascension Game Mode guide — it shares the same "power through fire" DNA.
2.3 Biome 3: The Ashen Depths
Difficulty: ★★★★☆ | Suggested Level: 17–24
Things get real. The Depths are a labyrinth of tunnels filled with poison ash clouds and Stalker-type enemies that can one-shot you if you're not paying attention. Bring anti-toxin consumables.
Navigation Tips
The Depths are infamous for their confusing layout. Stick to the right wall whenever possible — it'll lead you to the central chamber faster. There's a hidden bonfire behind a fake wall at the northeastern corner of the lower level.
Boss: The Hollow King — a former ascendant who failed. He uses delayed fire attacks that punish panic rollers. Count to two after his staff glows before dodging.
2.4 Biome 4: The Pyre's Maw
Difficulty: ★★ ★★★ | Suggested Level: 25–32
This biome is a vertical climb inside the Great Pyre itself. Platforming becomes precision-based with collapsing platforms and geysers of fire. You'll need the Ember Cloak upgrade to survive the heat zones.
Optional Super-Boss: The First Flame — an ancient entity guarding the Prime Ember. Defeating it gives you the best weapon in the game, but the fight is brutally long. Bring patience and all your healing items.
2.5 Biome 5: The Summit — Throne of Pyre
Difficulty: ★★★★★ | Suggested Level: 33–40
The final gauntlet. No bonfires. No merchants. Just you and a series of devastating encounters. Conserve your resources — there's a 3-phase final boss waiting at the top.
Final Boss: The Ember Lord — Phase 1 tests your dodging, Phase 2 adds environmental fire, Phase 3 is a DPS race. Key strategy: save your Ember Burst for Phase 3 to interrupt his mega-attack.
For a different kind of challenge, see our Silent Hill Ascension Gameplay Recorder — it captures the atmospheric horror angle beautifully.
3. Game Modes & Replayability
Scorched Ascension offers several modes beyond the main campaign. Here's how they stack up:
| Mode | Description | Best For |
|---|---|---|
| Campaign | Main story with all biomes | First playthrough |
| Ember Rush | Timed speedrun mode with leaderboards | Veterans |
| Shadows of Ashes | New Game+ with randomized enemy placements | Replay value |
| Boss Rush | Back-to-back boss fights with limited heals | Practice & bragging rights |
We've also covered Lol Ascension Game Mode if you're into the MOBA take on the Ascension universe — it's a wild ride.
And don't miss our deep dive on Project Ascension Gamepad for the best controller settings and button mapping recommendations.
4. Advanced Tips & Strategies
After 200+ hours of gameplay and interviews with top players, here are the strategies that separate the ashes from the legends.
4.1 Combat Fundamentals
- Stamina management is everything. Never let your stamina drop below 20% — you need it for emergency dodges.
- Weapon combos: Light attacks into heavy attacks create unique finishers. Experiment with different timings.
- Parrying is high-risk, high-reward. Practice on Scavengers before attempting on bosses.
4.2 Exploration & Secrets
The world is filled with hidden lore tablets that unlock bonus cutscenes. Use the Ember Sight ability (unlocked after the Smoldering Canopy) to reveal hidden paths. There are 7 secret areas in total — finding all of them unlocks the "True Ascension" ending.
4.3 Build Guide: The Ember Knight
This build focuses on strength and fire resistance, making it ideal for first-time players.
- Primary Stat: Vigor (40) & Strength (35)
- Weapon: Ashforged Greatsword (fully upgraded)
- Armor: Ember Knight set (found in Pyre's Maw)
- Key Ring: Ember Ring +5 & Flameheart Token
For a different playstyle, check out our God Of War Ascension Gameplay Pc guide for inspiration on adapting console controls to keyboard and mouse.
4.4 Boss Kill Order (Optimized Route)
- Scorched Scavenger (Wastes) — mandatory
- The Verdant Pyre (Canopy) — unlocks Ember Hook
- The Hollow King (Depths) — grants Ashen Key
- The First Flame (optional, Depths) — Prime Ember
- Pyre Sentinel (Maw) — gatekeeper
- The Ember Lord (Summit) — final boss
Also worth reading: God Of War Ascension Gameplay Ps3 for a look at how the earlier title influenced Scorched Ascension's combat DNA.
5. Player Interviews & Community Insights
We spoke with Ash_Ember_TV (top 10 speedrunner) and LoreMasterKael (community lore expert) to bring you exclusive insights.
"The key to sub-2-hour runs is skipping the optional bosses in the Depths. The Prime Ember is tempting, but the time loss isn't worth it unless you're going for 100%."
— Ash_Ember_TV, speedrunner
"Most players miss the connection between the Hollow King and the Ember Lord. Read the tablet in the King's arena — it's a heartbreaking backstory that changes how you see the final fight."
— LoreMasterKael, community lore keeper
Our community also loves the Ascension Gamebook Kickstarter — a fantastic companion piece that expands the lore.
Search the Walkthrough
Looking for something specific? Search across our entire guide library.
Leave a Comment
Share your experience, ask questions, or suggest improvements.
Rate This Guide
How helpful was this walkthrough? Your feedback helps us improve.
7. Frequently Asked Questions
Is Scorched Ascension harder than Dark Souls?
Comparable but different. The game emphasizes environmental hazards as much as enemy combat. If you're patient and observant, you'll adapt faster. The Ember Sight mechanic gives you an edge that Souls games don't offer.
Can I respec my character?
Yes — after defeating the Hollow King, you'll unlock the Ashen Mirror in the hub area. It costs 5000 cinders per respec, so choose wisely but don't be afraid to experiment.
How many endings are there?
Four endings: Extinguish (walk away), Ascend (claim the power), Sacrifice (save the world), and True Ascension (secret — requires all 7 lore tablets). Each has unique cutscenes and achievements.
What's the best weapon for beginners?
The Ember Longsword (found in the Smoldering Canopy) has a balanced moveset and good fire scaling. Upgrade it to +5 as soon as you find Ember Stones.
For more on weapon builds, check out Project Ascension Gamepad for detailed controller mapping suggestions that work best with each weapon type.
8. Final Words: Keep Climbing
Scorched Ascension is a game about perseverance. Every death teaches you something. Every bonfire is a small victory. We hope this Scorched Ascension Game Walkthrough helps you reach the summit and claim your place among the legends. 🔥
Remember: the flame never truly dies — it just waits for the next worthy soul to pick it up. See you at the top, Ashen One.
⚛ — The Ascension Game Team